Saturday, August 22, 2009

Something Old, Something Blue

I realize it may be premature for me to write about blueberries a week before I leave for a camping extravaganza in Maine, home of the best blueberries I've ever had to date (I'm remembering my first venture with pie crust in college, a wibbly-wobble-fantastic lattice top over a Maine blueberry filling)...but as I've had blue on the mind I think I'm going to go ahead and talk blueberries right now.

Historically it hasn't always been a love affair between me and blueberries. While I do remember picking sour little berries from a bush that grew wild in my childhood backyard, even then it was more the thrill of eating something off a branch than it was the flavor of the berry. A current fan, searching for an explanation as to why I've so long ignored blueberries, I think the answer is I just needed time. Strawberries are so sweet and beautiful, raspberries alluring and tartly distracting. I believe the truth is that each summer I've been inching towards blueberries but it hasn't been until just these past few months where I've finally been ready to sit down and have a one on one with the little blues.


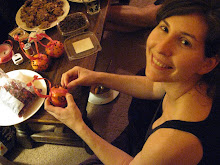
A fresh, soft and bright pint of blueberries is a wonder I'm newly excited about. As you may remember I'm also newly excited this summer about jam. I look at fruit stands in the Greenmarkets around town and think, "Oo! Strawberry jam. Oh, raspberry jam. YES! blueberry jam!!" I know summer is an especially hot time of year to commit to standing in front of the stove top constantly stirring sugar and fruit as it cooks down. But it is also the ideal time to find ingredients for the best jams. So with a little sweat, and a big love for jam, I recently tied my hair back and set to the burners to whip up a batch with some market-fresh blueberries.


For something different I replaced a third of the sugar with light brown sugar. The result was a slightly warmer flavor but let's be real; it's really about the fruit and the fruit surely made itself known. Turning brilliant purple, and growing incredibly thick from the pectin in the berries, the finished product was truly mouthwatering; a proper challenge to strawberries and raspberries worldwide.

And just the thing to top off a dinner party cheesecake (a recipe you may remember from the winter, but summer-spiffed-up here with 1 tablespoon orange zest and about a teaspoon of cinnamon).


The result was a blue-finger lickin' good cake! The natural sweetness of the berries, brown-sugar enhanced over the slightly tart and warmly spiced cake is a combination I am excited to pass along to your own kitchens and dinner parties alike. And sure, you could use any berry you'd like and the recipe would work and be delicious. But with, well, I suppose a bit of a crush on blueberries at this point, I'm giddy to put them in the spotlight here.

So to long time blue fans, and young blueberry lovers, this jam is for you.


Brown Sugar Blueberry Jam

360 grams blueberries
100 grams brown sugar
150 grams granulated sugar

125 grams blueberries

125 grams blueberries

1. Over medium-high heat, let a medium sized sauce pan warm up, empty.
2. Once the pot is hot, add the first amount of blueberries and both sugars.
3. Cook, stirring constantly (with a heat-resistant spatula), until the blueberries cook down to a thick, jam like consistency. As it get thicker, the sugar will want to start caramelizing; if you see it turning brown on the bottom of the pot, take the pan off the heat, stir some more, and then throw it back on. Make sure you stir constantly! Use the spatula to scrape the bottom and the edges around the pan.
4. Once the blueberries are thick and you can almost smell them caramelizing, add the second amount of berries.
5. Stir until blueberries soften, and mixture returns to a boil.
6. Add the last measure, stirring for just a minute or two, until the mixture returns to a boil again.
7. Let cool in a heat resistant bowl...the jam will be really hot when it comes out of the pot!
8. Once cool, refrigerate (or eat).

Yield: a little over half a quart

*for the cheesecake recipe, go here. Do everything the same (though I'd use a regular graham crust rather than the pretzel version), and at the end add 1 tablespoon orange zest and 1 teaspoon cinnamon to combine.

Thursday, July 23, 2009

CAKE.

Wedding cake that is. My first one!

An fanciful idea 6 months ago quickly, this past month, become a reality. For my high school friend Rose (ie-posie, mop head and a long list of other old time nick names), I very excitedly assumed the role of wedding cake maker extraordinaire...though the extraordinaire was a gamble as the whole of the experience was new and challenging at every turn. New and challenging and wonderful, I should add. I feel like the occasion calls for fewer words this time around, and more pictures. Care to take a peek?

After a lot of eggs, butter and sugar, flour misting the air, chocolate to make frosting, some fondant and a lot of gum paste (sugar!) flowers, after the pink wore off my hands from dying frosting, after one long drive from New York, NY to State College, PA, air conditioning blasting, me white knuckled in the front seat hoping the cakes were okay back there in the trunk, pulling off at every other rest stop to check...we arrived at the day of the wedding, in the reception hall, ready to put it all together.


With the help of my expert assistant we cut dowels for support, placed cakes veeeery carefully, and attached flowers (at times strategically to cover those first-timer bumps and wiggles in the outer frosting). We chose to do this all in our fancy pants which means we are either natural born, hard core cakers, or a just a touch crazy.


White shirt and pink dress still white and light pink, we successfully put everything together just in time to scoot ourselves to the ceremony. It was beautiful and joyfully tear-filled, with a fine spritzing of good-luck rain hanging in the air around all the happy friends and family.


From rosie posie to Mrs. McLaughlin!

Back to the reception hall I paced around nervously in my sequined flats, waiting for the doors to open. Had the cakes survived the few hours past? Would they have collapsed into a pile of red velvet, chocolate frosted, top layer yellow cake mush?? Would they have melted and sagged into a sad sack of sweetness? I threw back a stiff, double gin and tonic while I waited for the verdict.

Finally, showtime. And folks, the show was great! Both cakes in tact, standing in the glow of little glass-cupped white candles...did I mention there was a grooms cake? A football field, by request of the bride for her forever PSU true fan, now hubbie.


I have to say, man oh man did I feel professional! But most of all, I was so proud and just so happy to be able to make my dear friend so pleased on her special day.


It was a great adventure from start to finish. Challenging at many points, though with a pay off priced so high I'd do it again in a second. Which I truly hope to do again soon (hear that Brooklyn brides? If you need cake, you let me know!)

I do...hope you enjoyed the show!

Tuesday, June 30, 2009

A Quiet Night with Cherry Cake

When you find yourself at the cool end of a warm day, finished with work and settling onto your couch with a good movie and great company nearby, it is most certainly an occasion that calls for cake.

This fact is only further supported when you have the first of summer's cherries in your fridge, pink, red, and ruby...just waiting for some sugar.


I can personally attest to the fact that on a typical night it often requires great feats of strength to put down the chinese food take-out menu and make yourself something for dinner. Cake? On a weeknight? Who has the time?

Clatfoutis is your answer. Sounds French and fancy, yes. And well, French it is. But fancy? Not this cake. A classic dessert francais, typically baked with cherries though almost any fruit can be substituted, Clafoutis is almost like a custard, but golden brown on top and in this case packed with sweet and tart, brilliant, shiny cherries.

Like couch potatoes Russ and I spent Monday night wielded chopsticks, pitting cherries on the sofa, squirting pink juice on our arms and faces, thankful that our coffee table is already stained and that our carpet is dark...


During the first year of my time spent studying pastry, I took a class with one particularly snappy chef who was known to bring a tear to more than one sweet pastry-chef-in-the-making. Broad shouldered and angry eyebrowed, she never failed to make me chuckle on the days when she would scream, thick with the accent of rural Pennsylvania, "Class! Today we are going to attempt to make clah-FOO-die!"

No matter how you want to pronounce it, who can be angry when you are baking with a bowlful of these?


So. Why now is this dessert the answer? Flour and sugar stirred together, eggs and milk whisked in to combine, in less than a full sentence you are almost ready to put the cake in the oven. You don't even need to cut the cherries. And, in this particular recipe, like many others, there isn't a pat of butter to be found...so if you feel so inclined, pretend its not even dessert.

For this recipe I used muffin tins rather than the traditional round cake pan or skillet, creating mini clafoutis perfect for seconds. Or thirds. Or fourths...

(I just ran to the fridge and ate another one.)

On top of work and bills and meetings and errands, sometimes all it takes is a little cake to bring some well deserved quiet.


I will admit that baking the cake in the smaller muffin rounds created a darker edge than I'd have liked; make sure you keep an eye on the little guys so the outside doesn't burn! With this recipe they will souffle in the oven and sink a bit once they come out. It's okay. Taste one, you'll see.

If you aren't a cherry fan use sliced strawberries, peaches, blueberries or plums. All you need is a few minutes in your kitchen, a calm evening and an appetite for cake. Pick out a good movie, preheat the oven, and treat yourself to a little piece and quiet.


Cherry Clafoutis
adapted from The King Arthur Flour Company's Baking Companion

3/4 C flour
2/3 C sugar
3 eggs
1 1/4 C whole milk
1 1/4 t vanilla
2-3 cups pitted cherries, whole

1. Preheat the oven to 350F. Grease two muffin trays and set aside.
2. In a bowl whisk together flour and sugar.
3. In a separate bowl, whisk eggs until light and foamy.
4. Add milk and vanilla to eggs and whisk to combine.
5. Add egg mixture to flour in three additions, whisking to make sure there are no lumps!
6. Place 4 cherries into the cups of the greased muffin tray.
7. Fill 1/2 of each muffin cup with batter.
8. Bake for 25-30 minutes. A tester should come out of the cakes clean and the tops should just be turning slightly golden.

*An alternative to the muffin tins, as suggested by the cookbook authors, this recipe can be baked in a 9" cake pan for 40-45 min.

Yield:
approx. 20 miniature clah-FOO-dies!

Tuesday, June 2, 2009

An Hour Away

Did we leave off somewhere with jam?

I almost can't remember, its been a set of those kind of weeks. Picking at leftovers in the fridge, ordering out...I hate to leave you for so long without a good snack. I really do. I had grand plans of coming back with a bang, a recipe for a gooey cake, or a magnificent new way to cook asparagus.

What I ended up with was a simple salad of spinach and tomatoes, and a decision that before ingenious chocolate cake needed to come a plain, simple get away. To clear the mind. And maybe to find a good eat somewhere out there too...


Only an hour away. The air was salty with a hint of sunscreen. On a quiet, slightly chilly Sunday, Fire Island was almost barren except for a handful of brave little girls in pink bathing suits, pockets of sandy horseshoe crab skeletons, a few stray runners and yes, also a good number of naked beach goers fishing, sleeping, tossing a frisbee and whatever else their chilly little behinds desired.

Strolling by all kinds, we wandered into the beach bum town of Kismet, complete with a village of uniquely individual houses with clever names carved into wood signs, no cars, one sweet shop and a hoppin' fish shack overlooking the pier. Starving and ready to eat anything, I had my first run in with clams on the half shell.


It went well.


Paired with iced tea, like the best part of chowder the firm little bites of seafood exploded with the flavors of a gourmet's take on seawater. I could have eaten at least a dozen more.

From empty clam shells we moved to soft shell crab sandwiches, served on crispy white bread toast just as it ought to be on the deck of a seafood pub blasting tunes from a neon jukebox inside. We got carried away with seriously fried onion rings and a big plate of fries...before I got to taking a picture of my sandwich for you I had eaten all of it.

So I took a picture of a pretty lighthouse instead.


I know, I know. Where's the toast? A lighthouse is no soft shell crab. But in their own way, they both leave you with a smile and sometimes, like going from Brooklyn to beach, something different is nice.


Feeling full and happy we started on the road home. I quickly fell asleep, into a coma of seafood and sandy toes, relaxed, slightly rosy from the sun and with a head full of wind swept, suncreeny crazy hair I never intended to share a picture of with anyone. (You'd thank me if you'd seen it.)

And now I'm back. There are strawberries at the market that are like nothing else. Tomatoes are popping up and sugar snap peas right beside. I've washed the sand from my feet and can just remember the salty taste of those clams...the hour away was needed and nice.

But it is good to be home. Better when there are strawberries around. And maybe it's time for that ingenious cake...

Friday, May 22, 2009

Enigma On Toast

How is rhubarb like an avocado?

For just one tiny second, avert your thoughts from pies and strawberries and jam and cream, and think about this (just one second, I promise). We all know avocados are fruit, but generally not thought of as anything but a green veggie ideally paired with chips and a salted margarita. In the same way, rhubarb, technically a vegetable, is nestled in with pie pans and jam jars and all the sweet, fruity desserts of spring. A gardener's enigma: in a world of fruit parading as vegetables, is rhubarb the only vegetable playing dress up as fruit?


Just some fruit (or vegetable) for thought. And because disguise or not, it does seem that rhubarb belongs in sweet pie shells rather than salad bowls, lets get back to the sugar.

If you don't have time for cutting butter into pie dough, or you find your store shelves still waiting for summer strawberries...the answer is jam. Its quick, its sweet, and as you will see in a few short scrolls of your mouse, quite versatile in those moments requiring attention to sweet tooth needs (which can be very serious indeed).


From long, lanky stalks, rhubarb cut into little pieces turns to a confetti of pink and green, tart and tasty. Add a little sugar, a little heat, and one (heat resistant) spatula...


Jam baby!

Even if it weren't sweet and drool-inducingly delicious...not that I drooled..., this jam is soft and pink* and cheery. Vegetable? Good disguise indeed. I strongly believe that sometimes you need something lovely like this in your fridge, even just to look at while scanning the options. It is no coincidence then, I should note here too, that this simple recipe comes from a woman who I believe has mastered the art of using sweets to sweeten up more than the dessert hour, my favorite pastry chef Nancy Olson.

We've covered that this fruity vegetable is sneaky, pink, cheery and occasionally inducing of a lip smack or two... but is it all just for toast? Oh no. No my friends. Think ice cream. Stir it into your oatmeal. For a hot-like-summer spring day, just mix in a bit of the syrupy smooth part into a glass of tonic water for rhubarb soda.


And toast works too.


Fruit, vegetable... a little sugar and jam is the word. I suppose you could also call it a compote, but calling it jam makes its something you can eat for breakfast without flirting at dessert. And I think that's grand.

So go think biscuits, ice cream, ricotta, crisp sodas, toast, yogurt, cereal, shortcake...


*The color of your jam will depend on the color of the rhubarb you buy- if its a greener bunch, don't be discouraged if your jam turns out a little brownish. It will still taste great!!


Nancy Olson's Rhubarb Jam

360 grams rhubarb
250 grams sugar

125 grams rhubarb

125 grams rhubarb

1. Over medium-high heat, let a medium sized sauce pan warm up, empty.
2. Once the pot is hot, add the first amount of rhubarb and sugar.
3. Cook, stirring constantly, until the rhubarb cooks down to a thick, jam like consistency. As it get thicker, the sugar will want to start caramelizing; if you see it turning brown on the bottom of the pot, take the pan off the heat, stir some more, and then throw it back on. Make sure you stir constantly! Use the spatula to scrape the bottom and the edges around the pan.
4. Once the rhubarb is thick and you can almost smell it caramelizing, add the second amount of rhubarb.
5. Stir until rhubarb softens, and mixture returns to a boil.
6. Add the last measure, stirring for just a minute or two, until the mixture returns to a boil again.
7. Let cool in a heat resistant bowl...the jam will be really hot when it comes out of the pot!
8. Once cool, refrigerate (or eat).

Yield: a little over half a quart.

Wednesday, May 13, 2009

It's ALIVE!! A tale of soft shell crabs

I tell you, times as of late have been scary in my kitchen.

First, it was the invasion. Coming out of that on the winning side with bread pudding leftovers for days, the coast seemed clear. At the Greenmarket beautiful piles of greens, towers of asparagus and the first bright pink stalks of rhubarb started to fill in around the ramp mounds. A curvy bunch of baby bok choy stole my heart and with the sun shining, my flip flops flopping the pavement, I headed home, unknowing all the way, to see what Russ had picked up from the fish market.


Part of me feels as though I should stop letting him go. If you recall the last thing he pulled from that brown paper fish bag... Well this time it was worse. Or better. Depending on if you asked me before or after I ate it.

We'd been planning on taking a stab at cooking soft shell crabs for a few weeks and gathering information on how to do it right along the way. Most reliable sources said, "Buy the ones that are still moving. If they don't move, don't bother." This advice was largely why I was responsible for picking up the produce. I'm an adventurous eater but much more so when the breading and batter and heat has been applied. I'm not sure how much movement I expected but when Russ pulled out the first crab, legs squirming violently in the air around his hand what I didn't expect to do was to scream like a girl.


Which I did. In response to my squimish squeeling he replied, "All you have to do is cut off their faces and rip out their gills." Unassumingly charming as he tickled their bellies, I silently wondered if there was an evil side to this man before me. Watching the poor little crabs tapping their frenzied little legs on the cutting board as the knife came down on their soft little shells... So violent.


But. So. Delicious. Once I successfully repressed the image of that one, still-twitching claw, covered in egg wash and cornmeal, not yet fried and not yet dead...I could let myself enjoy the explosively rich, velvety, salty and amazing flavor of the crabs. They were aboslutely as insanely delicious as the scene in my kitchen was perhaps insane during their preparation.


The steamed bok choy was light and good for the heart, but as the crabs sizzled in the pan all I really wanted was a plate piled high exclusively with soft shells. After I took this picture I added another one to my plate on the spot.

If you aren't so lucky to have a fresh fish market around the corner (or aren't so brave or don't have a crazy bearded butcher for a kitchen companion), you can make a delicious soft shell crab meal from fresh, non-moving crabs that have simply died in refrigeration; it happens quickly once the crabs are put on ice (you'll still have to clean them!). Just make sure you know where they came from and when they arrived in your store.

I know I've painted a gruesome picture here. But I promise I did it because I believe you can't make it through the season without having at least...6 crabs. They are highlight-of-your-week, worth-cutting-off-a-crabs-face scrumptious. And sometimes you need to see proof that you can make it through the other side to get there.

Well I'm on the other side. And I'm going back for more.


Cornmeal Battered Fried Soft Shell Crabs

5 Soft shell crabs
2 eggs
Cornmeal to coat
Sea salt to taste
Black pepper to taste
Fresh thyme, to taste

1. Using kitchen shears, snip off the eyes and mouth of the crab. (This will be about 1/8 of an inch behind the eyes, cutting straight across.)
2. Snip around the edge of the body, folding back the top of the shell. A fingerlike structure should be visible inside the body.
3. Either with scissors or with your fingers, remove this structure from both sides.
4. On the belly, pull back the flap, referred to as the apron, and snip it off as well.

For help with cleaning your crabs, check out this video.

5. The yellow gel-like substance you'll see in the crab can be clean out, or left to be eaten. Its edible, but it may make you feel better to clean it out.
6. Rinse crabs thoroughly under water. Pat dry.
7. Dip in egg wash.
8. Mix salt, pepper and thyme into cornmeal. Coat crabs with mixture.
9. Coat the bottom of a frying pan in a thin layer of olive oil. Heat.
10. Over medium heat, place crabs in pan. Cook on both sides until golden brown.

Yield:
5 crabs

Tuesday, April 28, 2009

Attack of the Ramps

It could be a tag line on an illuminated poster of a B movie, a la horror genre.

"They came out of the fields. They invaded New York. They're green, they're alive, they're..."

Ramps! Horror turns to happy endings. With winter officially behind us, ramps are the earth's way of assuring us its spring. Giving us a pat on the back, saying, "Congratulations! You made it through winter. Now have a snack."


Also known as wild leeks, ramps are a garlicky, oniony, curvy, leafy, beautiful and delicious spring vegetable. Overflowing from every other booth in farmers markets around the city, ramps are here and here in number. Making the city a little greener and significantly more tasty. One of the best things about these little sprigs of tangly-rooted vegetables (aside from their flirty looks and scrumptious flavor), is that you can cook them almost any way you want. Sauteed, grilled, baked...

While it's still cool enough to turn on the oven in our cozy kitchen, we decided to use the bunch of ramps whisked away from the greener side of Union Square Park to make a savory bread pudding. Over lemon sodas we sliced crusty bread, infused sage into whole milk, and sliced our ramps, separating the white stalk from the bright green leaf, but using all parts in the pudding because...well, you can. So why not.


A few eggs, salt, pepper and some Grana Padano, deliciously salty cheese, and the pudding was only an hour at 350 degrees away from our bellies.

Now if you are reading this thinking, bread pudding, ew no thank you, that sounds worse than an alien invasion...I can empathize. There was a period in my life when the thought of squishy, wet bread sounded wholly and completely gross. But when you think of it as a moist, rich, sophisticated cousin to stuffing, soft, comforting, and in this case salty, with pockets of bright ramps... Aren't you tempted to try a bite of this?


I hope so. Once golden and steaming and crispy around the edges, we'll just say I was truly happy (down to the bottom of my stomach) for spring. Plus bread pudding is ideal for warming you up just enough to ward of the spring night chills. Throw ramps in the mix and nearly the whole pan will disappear before you realize it. That is, if your experience is anything similar to mine...


We ate the leftovers with eggs over-easy for lunch the next day. Eggs and ramps will not steer you wrong. I think some sausage added to the mix wouldn't hurt one bit either. Having fully succumbed to the ramp bite, we used a second bunch to saute and lay over pan fried salmon for dinner the next night.

If I sound ramp crazed, well, okay I might just be. But consider it may be an even crazier thing to let spring pass without giving into the ramp invasion. Remember, no matter what it may sound like, they aren't out to get you.

You should go out and get them.


Savory Ramp Bread Pudding

1 large loaf of crusty bread, cut into big pieces (enough to almost fill an 11 x 7 inch baking pan)
1 bunch of ramps
5 cups whole milk
15 leaves of sage
7 eggs
1 1/2 cups grated Grana Padano cheese (or anything hard and salty)
Salt
Pepper

1. Preheat your oven to 350 degrees. Grease an 11 x 7 inch baking pan.
2. Heat milk with sage, bringing it almost to a boil. Take it off the heat, cover with plastic wrap and let infuse for 5 min. Remove sage.
3. In a large bowl mix bread and milk. Let soak.
4. Cut roots off ramps. Slice the white part of the ramp into small pieces, cut the leaves into larger chunks. Reserve a few whole leaves for decorating the top of the pudding.
5. In a small bowl, whisk eggs together with white ramp pieces, salt and pepper.
6. Mix egg thoroughly into bread and milk.
7. Stir in 1 cup of grated cheese.
8. Spread pudding into pan.
9. Garnish the top with whole ramp leaves and the remaining 1/2 C cheese.
10. Bake for 1 hr and 10 minutes or until pudding is golden brown on top.

Yield:
approx 15 servings


Monday, April 20, 2009

Spats

The highlight of my eating last week started in a dispute over soup. Gumbo to be specific. I don't recall how soup became the topic of conversation...but then again, why wouldn't it be. Soup is delicious and wonderful and I could muse about it all day long. So maybe I got a little worked up when I was sure gumbo was cooked with rice, and Russ resolute that is was served over it.

Technically speaking, I lost the tussle. But I was decided that gumbo was on for Monday dinner so the loss was of little consequence.

Waiting tables in my college days, I donned a white apron serving up gumbo and crawfish etouffee at a small, spicy little cajun/creole restaurant in Central Pennsylvania. Spats Cafe. What great, funny, delicious memories I have of that restaurant. Filling ice tea pitchers and polishing silverware in the morning, I'd watch the cooks stir big pots of dark roux under the waves of heat spilling off the flatop in the kitchen. Roux, a rich, slowly cooked combination of fat and flour is what makes gumbo gumbo. Up until this past week I'd never actually made it myself. So it wasn't just soup we were talking about for dinner. It was soup and a roux.

And the perfect occasion to try the contents of the peanut butter jar of homemade lard; rendered from pork fat by my genius-in-the-kitchen friend, and farmer, Anna.


It was a what's-in-the-pantry inspired gumbo, so for serious soupers, not your traditional mix. No peppers or okra. But smoked duck breast, red beans and rice (cooked in), carrots, kale, sage and thyme. Ok, the duck breast was an impulse buy at the grocery store. But a delicious addition to be sure.

With the soup simmering on a burner, I stirred the roux. The nutty, rich smell of the flour and fat cooking sent me back to those days of hot sauce and cornbread at Spats. Committing to that roux, stirring for about 30 minutes until it grew a walnut, chocolate brown, the smell and feel of it all sent my thoughts towards what else I could possibly come up with to put roux in...

But once mixed into the stock pot, it was clear that roux was made for gumbo. Gumbo for a roux.


For me, the peppery burn of the brown broth was seasoned with the flavor of Spats lunch breaks, slurping soup at that back table sprinkled with silverware wrapped in mardi gras beads.


For everyone else, it was a flavor that cooked with rice, or served over it, no matter. As long as there was enough for seconds, no arguments to be found.


*Don't forget that the Virtual Great American Bake Sale is still in progress. While your soup's on the stove, check out the recipes and share a little something before chowing down!


Wild Rice and Beans Gumbo

1 cup red beans
1 cup wild rice
6 medium carrots
1 bunch celery
1 large red onion
1 10" andouille sausage
1/2 pound smoked duck breast
1 pound chicken breast
5 large leaves of kale
2 cloves garlic, minced
2 bay leaves
1 rosemary sprig
1 T sage
1 T thyme
1 T sea salt
2 t cayenne pepper
lots of black pepper (50-60 turns of a peppermill)
3 qts chicken stock
1/2 cup flour
1/2 cup fat (butter, lard, oil...)

1. Rehydrate beans according to directions on package.
2. Chop celery, carrots, garlic and onion.
3. Cube duck breast and cut andouille sausage into slices, then quarters.
4. Cube chicken. Season with salt, pepper and cayenne.
5. Cut kale into ribbons.
6. In the bottom of a large stockpot, over medium heat, add 1 T olive oil, duck breast, sausage, garlic and spices, and brown for a couple of minutes.
7. Add chicken, brown.
8. Add carrots, celery and onion. Sweat until onions are translucent.
9. Pour in stock.
10. Add rice and beans.
11. Bring to a boil, stirring occasionally.
12. Reduce to a simmer, let cook for 1- 1 1/2 hrs. Taste occasionally for seasoning.
13. In a small saucepot over medium heat, mix together flour and fat. Stir constantly to avoid burning; cook until roux is a nice dark brown. Note- use a heat resistant spatula or wooden spoon...mixture is HOT! Let roux cool to room temperature.
14. Very carefully add roux to the stockpot. Stir to incorporate.

Yield
15-20 servings

Monday, April 13, 2009

Something To Share

My childhood food memories are some of the strongest so far. Waking up early for oversized sticky buns at the beach. Filling crinkly bags at the candy store after piano recitals. Shrimp with butter and bay seasoning. And cupcakes for school day birthdays.

Why the reminiscing? Because today kicks off Share Our Strength's virtual bake sale fundraiser. So first, some words from the organizer of the event, Kate Miller.

"Welcome to the Virtual Great American Bake Sale. 100% of the proceeds from the sale of these ebooks will go toward Share Our Strength's Great American Bake Sale program. Funds raised through Great American Bake Sale are donated to after-school and summer feeding programs--food programs that many kids depend on when school is not in session. Great American Bake Sale is a program of Share Our Strength, a national organization working to make sure no kid in America grows up hungry.

The ebooks are a compilation of recipes from submitters across the blogosphere and beyond. The ebooks are available for purchase based on any donation amount of the buyer's choosing."

Big thanks to Kate for organizing. Welcome hugs to new readers and noogie's to old. Now let's get down to baking.

What can you find inside the delicious pages of this year's e-cookbook? From this corner of the web, a hats off to special sweets in school; a recipe for my mom's chocolate chip cream cheese cupcakes. A cheese cake center decorated with the confetti of mini chocolate chips and draped in dark chocolate cake, it's just what a cupcake would wear to a big bash.


And this week is a big bash. At http://stolenmomentscooking.com/welcome-to-the-virtual-great-american-bake-sale/ you will find a list of all the other wonderful hosts who've created recipes to support Share Our Strength's important cause. Below you will find links for purchasing the entire collection of recipes at the cost of only what you want to donate to the event.

I still smile at the thought of smiley face cookies and apple pie with a perfect crumbly topping. Lemonade stands and chocolate chip cookies on chilly days at home. In hopes that more and more and more kids can grow up with sweet memories, browse the bake sake, stay awhile, have a snack and share your support!


Chocolate Chip Cream Cheese Cupcakes
(known to my mama as “Cream Cheese Surprise!”)

For the filling
8 oz cream cheese
1/3 C sugar
1/8 t salt
1 egg
6 oz mini chocolate chips

1. Beat cream cheese, sugar and salt.
2. Beat in egg until combined.
3. Mix in chocolate chips.


For the cupcake
3 C flour
2 C sugar
1 t salt
1 C cocoa powder
2 t baking soda
2 C water
¾ C oil
2 T vinegar
2 T vanilla

1. Whisk together flour, sugar, salt, cocoa powder and baking soda.
2. In a separate bowl, combine water, oil vinegar and vanilla.
3. Add wet ingredients to dry and stir to combine.
4. Into a lined muffin tray, fill cups ½ full with chocolate batter. Drop about 1 teaspoon of cream cheese filling on top of each cup of batter.
5. Bake cupcakes at 350 degrees for about 35 min.

Yield: 24+ cupcakes


The Complete 2009 VGABS Recipes Ebook


Features all 170 of the submitted recipes. Many of the recipes include pictures.

On the checkout page, manually change the amount (USD) field to your donation amount.

Add to Cart

Shopping cart courtesy of E-Junkie.

Tuesday, March 31, 2009

Regaining Strength

Folks, it is spring. Yes. It. Is. Spring!

And holy crab cakes, is that a good thing. This last two week stretch has been a doozy. A blast of serious winter chilliness, Russ with a case of bronchitis, and then a streak of plain, gray, rainy days.

For awhile our kitchen was still as we looked to really spicy pad thai from down the street and grilled cheese dipped in creamy soup. Then, a stirring. Cauliflower the color of movie theater popcorn.


And sweet, heart shaped beets.


On the last of the rainy days, when you could almost believe the suns efforts above the drizzle, matters called for a big batch of chocolate chip cookies. I put in two times as many chips just because it felt right.


Finally, last night over big bowls of chicken and wild rice soup, pink radishes and brilliant, soft carrots, it was clear that we were coming out of the snowy woods. We crunched on toasty, olive-oiled and salted bread and with every crusty chomp, every soupy slurp, I could feel myself finding that long longed for, spring strength.


Today it is sunny and cool. The Mister Softee truck just drove by clinking out it's tune. And while, as I'm just out of the end-of-winter-push and not quite ready with a recipe for you (though if that soup just looks too tasty email me and i'll happily scratch down a rough draft of the one-pot-make-it-up-as-you-go healing wonder!) I do have something I wanted to share.

With thoughts of picnics to come and ice cream truck jingles, I think it is the perfect time to turn a dreaming mind towards Share Our Strength's Great American Bake Sale. Share Our Strength is a wonderfully good hearted national organization whose goal is to fight childhood hunger in America. In their annual Bake Sale fundraiser, you can host as a baker, or support, as a snacker, and all the proceeds of your bake sale efforts go to after-school or summer eating programs in your area. OR...as a reader...you can look to this year's new virtual bake sale where you will find a recipe by yours truly! On April 13th, a post will be published on stolenmomentscooking.blogspot.com, with links to contributing bloggers and their favorite recipes for sweets. An e-cookbook will be available there too (as well as here), with all the recipes compiled for your use, at a price of whatever you'd like to donate to Share Our Strength.

Please do get in touch with me if you have questions. And if you're a blogger to whom this all sounds scrumptious, email virtualbakesale@gmail.com to get involved.

For it is spring my friends. It is time for pretty produce and cookies for kiddos. Stop back again soon for both.

Wednesday, March 18, 2009

The Challah That Lived

Once upon a time...

There were eggs and there was flour. There were little packets of yeast and a sticky lidded jar of honey. There was also me, excited, clueless, venturing for the first time down the path of bread baking, a recipe for challah in hand, no idea what was ahead. I still remember that summer night in college when I opened the oven to see my first loaves of bread, enormous, melded into one insanely oversized version of challah wedged in between the baking racks. That night I sat with great friends on our old house's wooden porch, listening to bluegrass and pulling off big chunks of sweet bread long into the summer night.

I've learned a thing or two about bread since then. Most importantly, I think, that it is one of the best things to make for company. That first challah recipe made an appearance more than once in my college kitchen, provided familiar Sunday snacking during a year I spent with friends in France, and most recently, showed itself dressed up as french toast for breakfast hosted in my little corner of Brooklyn for neighbors, old and new.

While I will scream for any kind of loaf (save rye...I'm still working on that one), challah is where it's at in my heart. Streams of honey? Yes, yes please.


With more than one bread catastrophe under my belt, I will be one of the first to say, making bread is not easy. It doesn't fit neatly into the pages of a cookbook, isn't really composed of precise measurements or times or degrees. Bread has a life of its own. Like a person, you've got to pay it some attention, but also know when it needs some time alone. You can't control it, you can only work with it. But if you care for it, it will never disappoint.

So who has time to take care of a ball of flour?? Not many. There are some corners that just can't be cut, but to avoid leaving your bread out to grow angry and wild while you sun at the beach eating croissants and drinking petite bottles of pulpy orange soda...


...you may find it helpful to mix your dough, then refrigerate it overnight, letting it sit out to come back to room temperature the next day. Just the same, waking up early on a bright springy Saturday, mixing together your dough and pulling sheets back over your head to take a morning nap isn't a bad option either.

Yet another tricky element of challah specifically, is the braiding. Before I owned a chef's jacket and clunky black kitchen clogs, I just rolled three snakes and braided my bread like a pony tail. It works just fine. Braiding challah can be easy as pie or really quite difficult. If you are feeling adventurous, I think rather than reading the short, confusing, lemon of a novella that would be my explanation of the processes, go here instead to learn a 4-strand braid.


The recipe I still use is one that I found while searching online years ago. The title, "Mega Challah," caught my eye. It's author is Bob Evans, working from Ella Russell, working from Edward Epse Brown. I don't know Bob or Ella or Edward, but I imagine them to be jolly souls with good taste in the kitchen and quite the knack for kneading.

This time around I made one small change, adding about 1 cup of buckwheat in place of whole wheat flour, using white for the rest. As we milled around the kitchen, drinking coffee, finishing off bacon in it's pan of greasy glory, I grew a little nervous about the results...I have a bad habit of experimenting for company. Most of the time they come back. But when its the promise of homemade bread on the line, the stakes rise higher.


After the first few bites, the answer was great. Buckwheat + challah = yes, yes please. Topped with spiced stewed apples, bacon and freshly squeezed oj, the challah wins again.


And once again, in great company. Over juice and syrupy toast, we happily downed brunch, talking about paint colors for new walls, wisdom teeth, dogs, the crazy things we do for love, and Santa Clause.


Soon the last earthy buckwheat challah bites turned syrup mops, wiping plates clean. With one, truly mega challah remaining we wrapped up chunks of the second loaf for our friends as they headed out to finish the courses of their almost-spring-warm Sundays.

The end of the story is: you feed bread its flour and yeast, it feeds you soft, crust-enevloped delicious loaves of sliceable happiness. It may rise out of control. It may not rise enough. You may have a hot spot in your oven, say, and burn the bottom of one loaf. It's all part of the fun. It's a truly alive experience, something that starts with you and your dough, maybe ends with friends and a feast, and does usually, overall, end quite happily indeed.


Buckwheat Challah
adapted from this seriously Mega Challah recipe

WARNING! This is one of those just-hardly-a-recipe recipes. No, I didn't forget the measurement for flour...you've got to work with the dough in this one till it's just right (can you hear pastry chefs cursing and throwing pans!). I think it's fun to abandon scales every now and then. True bread lovers, you can do it! And I'm here for you if you have questions!!

1 T white sugar
1 T yeast (active yeast from those little packets in your grocery store!)
1 C water, warm, but not hot
1.5 oz butter, melted
3/4 C honey
5 eggs, plus a yolk for eggwash
1 C buckwheat flour
White flour

1. In a large bowl, mix together sugar, yeast and water.
2. Stir in white flour, enough to make mixture too stiff to stir with a spoon.
3. Meanwhile, whisk together eggs, honey and melted butter.
4. Add egg mixture to the flour and yeast, stirring and folding just until dough is broken up in the liquid (do not panic, it will look soupy and strange at this point!)
5. Stir in buckwheat flour.
6. Gradually add white flour until mixture can not be stirred any more.
7. On a well floured surface, with a bowl of a few cups of flour on hand, begin kneading the sticky dough, incorporating more flour in as needed.
8. Knead for awhile!!! In the end dough should be just slightly tacky, and smooth.
9. Turn dough into an oiled bowl, cover and let double in size. Or, if you'd prefer, stick it in the fridge, take it out the next morning and leave it in a warm spot until room temperature again (depending on where you live anywhere from 1 to 5 hours...or more!)
10. Divide the bread as needed to braid it as you'd like.
11. Egg wash the loaf.
12. Let sit for about 30 minutes.
13. Egg was the loaf again.
14. Bake for about 50 minutes at 350 degrees. Bread is done when the internal temperature reached 195 degrees.

Yield:
1 really large loaf

Tuesday, March 10, 2009

One Fish, Ooo...Fish

I've been sitting here at my little white screen now for many a minute, trying to think of an eloquent, perhaps even witty way to say what needs to be said. Now, I've decided it may just be one of those things best simply blurted out. *(uncomfortable throat clear)* Before I became the food-loving, feasting omnivore that I am today, I'd have been described by some as...irrational. Ok, neurotic. I hinted at it in early entries here, but the truth is I haven't been completely honest with you about my past in the kitchen.

I wish I had tallied the number of peanut butter and honey sandwiches that saw me through elementary school. Or cereal bowls that served as breakfast, lunch, snack and dinner through all the numbered grades, splashing over into my college years. For the larger part of my life I was the pickiest of eaters. But it wasn't just that. My finicky attitude ran so rampant that there were certain foods that rather than a hand wave and a shake of the head, elicited a full body cringe at the thought of bringing them into my house. The list included (though was not limited to) cheese, dill pickles, and fish. Silver sided, slimy, fish with their eyeballs staring me down... Fishsticks, sure. But real, head-to-tail fish. Never.

I have come very far from those pickle-fear-filled days. And while I welcome a delicious, roasted fillet of fish, seeing the animal, whole and slick in my house, it is still something I haven't dared to stomach. That is until this fated Wednesday past.

Russ comes home bright eyed and excited. He is holding a bag.

"Just wait until I cook you dinner tonight," he promises. He reaches into the bag, revealing his grand plans.


Rainbow. Trout. I feel an immediate, involuntary compulsion to grab a box of cereal and run to the farthest corner of the apartment. Russ is confused. I fess up my fear of floppy, fin-on, fresh fish. He makes promises of butter and garlic, sea salt and rosemary, sage and white wine.

I say first things first.


Sipping my drink, blushing a hint, I make a firm commitment to squelch the outward display of food phobia. Inside, I allow myself to silently freak out, still wobbly in the gut.

But, as the herbs come out, and the fish heads comes off, I find myself growing increasingly able, and interested, in the show before me. Watching the process of that slithery animal becoming what I recognize as "food fish", I'm aware of my lack of connectedness to what I've consumed so readily in breaded sticks and sesame-crusted fillets on lunch salads. The knife gracefully splits the suddenly sweetly-shiny, silvery skin. Soft pats of butter sink down into the light pink sides. Sage and rosemary is ticker-tape on this seafood surprise party.

By the time the fish is slid into the oven I'm watching the clock, asking how long until we eat. Eyeing Russ saute maple syrup and thyme glazed butternut squash doesn't hurt the situation one bit.


Smelling the rich, sweet and wine-bathed fish roasting, my safety cereal box is long packed away into the pantry.

With some greens, syrup-sweetened squash and that surprising little fish on the plate, I think I may have just gotten past the breakers.


The fish, my friends, was awesome. Oh my gosh was it tasty. I ate a whole side and then went back for the other. I couldn't believe it. I ate a fish. A whole fish. I'm only writing in repetition because part of me still can't believe it. Pulling at little pin bones, in the end I found myself loving the dish and leaving only a pile of peeled skin to prove it was there at all.

So now you know. I feel good to have gotten that bit of my past aired out and off my chest. I feel even better about passing this recipe on to you. Stare that fish down and make this for dinner (ok, ok, if you're like me, have a glass of wine and have someone make it for you. Small steps.) Pull a surprise out of your shopping bag and let it surprise you. Let there be a place for peanut butter and cereal. But make room for a little fish too.


Herb Poached Rainbow Trout

2 whole, medium large rainbow trout, boned
2 cloves of finely chopped garlic
3 large sprigs of rosemary
1/2 t ground, dried sage
1 T butter
Fresh ground black pepper, to taste
Sea salt, to taste
1 1/2 T live oil
approx 1/2 C white wine

1. Remove heads and tails from fish, as well as any other non-fleshy material on the animal. Russ suggests cutting a little off the belly; because fatty-fish can store heavy metals in their bellies, and since you lose little from cutting there, it's a not-bad, healthy idea.
2. Open fish so skin is down, and flesh of both sides faces up.
2. Season the meat with sea salt and black pepper.
3. Sprinkle one side with garlic.
4. Add rosemary needles to one side of each fish.
5. Sprinkle sage evenly over opened fillets.
6. Distribute small pats of butter over one side of each fish.
7. Close the fish like a book.
8. In the bottom of a medium sized baking dish, drizzle oil to coat and place fish in pan.
9. Pour in white wine until it comes about half-way up the side of the fish (but not high enough to spill into the cut fillet! You may have to add more or less than the recipe suggests, depending on your dish and the size of your fish).
10. Bake at 375 degrees F for 15 min.
11. Test fish for doneness; you don't want to see any pink in the middle! However, note that it is ok to eat fish like this a little rare, and overcooked the fish will turn to mush. The cooked flesh of the fish will be creamy white rather than light pink.

Friday, February 27, 2009

Food and Thoughts and a Green Kitchen Tablecloth

Food is a beautiful thing. As are strong, sweet memories. And, as it's turned out, so too are green cotton tablecloths.

Because I love food, stories, and most particularly the moment when they combine into one, I couldn't let this week pass without sharing a glimpse of the feast and tales of my folks recounted during the recent visit I made to my grandparents. Grammy and Jack; always sitting at that same soft, green, white-dotted tablecloth, my life is expertly seasoned with food memories from that household. My sister filling her cheeks with Easter candy while the grownups were downstairs. Cracking nuts onto napkins, shredding the shells to pieces and picking out only the almonds leaving Brazil nuts and chestnuts too hard in the bowl. Peanut butter waffles. Bacon anytime we wanted it.

We would spend most our visits collected around that tablecloth, eating, talking, snacking until the next meal and then eating more and talking our way through till bedtime. As the tablecloth stayed the same so too have some of the foods that over so many years now are both symbols of family, and triggers for classic memories-turned-stories by my grandparents. And of course there is always something new...

My grandfather eats butter on everything. Toast and pancakes, yes. But also cookies, pretzels, cake...you name it and before going down it gets a good slathering in butter. So of course our weekend started off with a tall glass of milk and a properly butter-frosted coffeecake muffin I'd brought from the city.


Which opened the marvelous flood gates for the stories to begin. We talked about cake. Then wedding cakes. Then tales of my grandmother's father, his candy business, his tools and time he spent carefully shaping flowers made of sugar for his own wedding cake creations. Then stories of family weddings. Then...have you ever seen a picture of your parents wedding cake? No?! Then photo albums seen for the first time, copies of wedding vows and the story of that hippie-cake of carob, brought to the wedding in a truck bed, an oversized creation of two hands reaching for each other...and a picture to match.


After coffeecakes and wedding talk we stayed at that table, drinking the required birch beer, eating the proper accompaniment of Chex mix, and listening to tales of my grandparents days on the Chesapeake Bay. From calm waters to wild storms, naps on deck and martinis in the cabin to rescues and rough waters, the stories filled the afternoon. Like a fine wine, the recounting of my grandparents younger days are best paired with a ham sandwich on sourdough, potato chips and a refill on that birch beer.

As night snuck in we settled into arm chairs and sofas, wrapped-up in afghans. Then, the standard offer of my grandfather's licorice. Strong, salty stuff. Never for me but happily a hit with Russ. Perhaps to wash it down, there is always, too, a light-blue wrappered stick of Black Jack teaberry gum.


The next morning begins the same. Butter on coffeecake. Cups of coffee. My cherished bowl of fruit loops (an indulgence I allow myself only at that green covered table). A refill on the cereal. From morning till dinner time it was stories from my grandfather's old diner. Advice on how selling iced-tea would make you your money back then. Frustration that a little glass is just too expensive these days. Recollections of sweet potato pie and arguments over the size of the dish the neighborhood diner's banana split comes in (hands creating spaces at least a foot long. I'm going to get one of those next time.)

After naps and more Chex mix, we end the visit with the ritual take-out visit to Nat's Pizza. We listen to the required telling of the time my dad and grandpa went in to see grease so thick on the floor it rose up through the plastic floor mats. We always laugh, then call to place our order.


Having finished off the birch beer we drink black cherry soda. It's a candlelit dinner of pepperoni, my grandfather opting for buttered gingersnaps as he steers clear from any food with "red stuff," (i.e. tomatoes).

The room is warm. Everything is delicious. While ruminating on the fairness of pooled tipping thus leading into tales of excellent servers from the past, namely Dakota Lil who carried a six-shooter on her apron, my grandparents described themselves as "not gourmet eaters". The truth is, at the heart, neither am I. Give me soda, a sandwich and chips, then pizza for dinner and as long as the company is strong, say, over that green table cloth, I am as happy as a girl can be.