Sunday, August 1, 2010

Something New


Hi old friends. 

I'd like to introduce you to the long awaited, long-time work in progress, Kaitie Rose Cakes.


From small batch recipes in my kitchen to photo shoots in friends apartments, Kaitie Rose is officially in business!  Currently based in Brooklyn, Kaitie Rose is now serving New York City and surrounding areas (we will travel...call with inquiries!!)

What does this mean for A Curious Cupful?  Well the news is sweet.  Quite literally.  You may see a number of changes coming soon to this page, particularly that subject matter will generally focus on all things celebration cake-centric.  Not so many veggies, lots of fruit, fillings, frostings and decoration.  Visits to the Greenmarket in search of the best seasonal flavors.  And no shortage of stories and recipes!

Also, check out our soon to be expanding Facebook page, where you may find a recipe or two from time to time as well... (up next, Plum and Currant Jam!)

Speaking of which those plums are calling.  So that's the short and sweet of it folks!  I could wait to share the news.  As always thanks for swinging through here to catch up on what's cooking.  Looking forward to sharing the journey ahead with you all!

Tuesday, April 6, 2010

Homemade


There are times in life when I am demanding.  Specifically, they are Saturday and Sunday mornings when Russ sleeps in late and I am hungry and  we are in need of a trip to the grocery store and there is no milk left for cereal.  Generally I pout on the couch, trying to ignore the roaring rumble in my stomach until Russ wakes up and makes something genius out of the scraps left from the week's shopping.

I'm not proud of this.  So, recently I decided to do something for the betterment of both myself and Russ's state of weekend well-being: I made breakfast.  Biscuits to be exact.  I'd been eyeing a recipe in Alice Water's new cookbook, In the Green Kitchen, for true, southern style buttermilk biscuits.  The book, which highlights staple cooking techniques taught by well seasoned masters, boasted one photo of baking soda leavened biscuits too beautiful to ignore. 

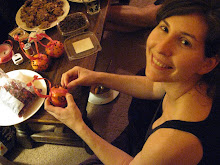
So ignore it I did not.  I woke up early.  Tip toeing around the kitchen, defly pulling out mixing bowls and baking sheets, I had grand plans.  I'd time the biscuits to be browning in the oven just as Russ would start to wake up...the scent of the baking buns tickling his nose and making him fall in love with me all over again.  He'd wake up and ask, "are you baking something," and just at that moment the timer would ding and I'd pull out a tray of fluffy, buttery, breakfast.  It was my turn for genius.


I pulled out the flour.  I cut cold pieces of butter.  I pulled out the salt, the sugar and the...  Oh shoot.  No baking powder!!  Major roadblock! I panic.  I fret.  I feel a familiar Saturday morning grumble and pout spreading across my face.  But I am determined.  I flip madly through the pages of the cookbook and discover, a ha!  Of course!  Right there in fact on the very page I was reading...I can make my own baking powder!

Homemade recipe #1:  Baking powder
1 part baking soda
2 parts cream of tartar

Refreshed, renewed, I press on.  I rub the butter into the flour.  I pull out the...  Oh shoot shoot shoot.  No buttermilk!!  I remember that we are due for that weekend grocery store trip and I grumble a Charlie Brown grumble, envisioning and dark, angry curly cue swirling around over my head in frustration.  Back to the books.  Homemade buttermilk?  Impossible.  But...wait...Yes! Possible.

Homemade recipe #2: Buttermilk
1 cup whole milk
1 Tablespoon lemon juice

The mixture looked strange and curdled, but then that is exactly as it should be, and having made it through the recipe with everything else in stock, I can attest, it makes things taste as they should taste as well.

After lightly kneading, gently rolling and carefully cutting, I added one extra homemade touch I love to find an occasion for.  A light sprinkle of vanilla sugar, made simply from storing leftover scraped vanilla bean pods in an airtight jar of granulated sugar, gives simple sweets that little kick of...mmm, this is tasty indeed.


And well, they were.  No I did not prepare like a chef.  No, the biscuits didn't wake Russ from his sleep but they reheated well, and frankly, would be quite delicious at any temperature.  And I'm pretty sure he still loves me.  I mean, I made breakfast.  Homemade.  From scratch.


Homemade recipe #3
Buttermilk Biscuits
adapted from a recipe in Alice Water's beautiful new cookbook, "In the Green Kitchen"

 2 1/2 cups flour
2 1/4 teaspoons baking powder
1 1/2 teaspoons kosher salt
1/4 cup plus 1 Tablespoon cold, unsalted butter, cut in small pieces
approximately 1 cup buttermilk
3 Tablespoons sugar
Cream to brush the tops
Vanilla sugar to sprinkle

1.  Preheat oven to 450 degrees F.
2.  Whisk together flour, baking powder and salt.
3.  Rub half of the butter into the mixture until it's crumbly.  With the other half, press each piece into flat discs and toss in flour.
4.  Make a well and pour the buttermilk into the mixture.
5.  Stir just until the dry ingredients are fully incorporated with the milk.
6.  On a well floured surface, knead the dough gently, only a few times, until the dough comes together.
7.  Roll dough out to about a 1/2 inch thickness.  Pierce the dough through the the tip of a fork, across the rolled out area.
8.  Use a circle cutter, 2 1/2 to 3 inches wide, and press straight down, not turning, to cut biscuits.
9.  Sprinkle with sugar and bake for 8-12 minutes, or until tops are lightly golden brown.
10.  Hot out of the oven, brush tops lightly with cream and sprinkle again with sugar.

Yield:  approximately 12 biscuits, plus scraps for snacks!!  (re rolling scraps is not advised as kneading the dough again will make them tough and not nearly as delicious)

Saturday, March 13, 2010

Cake and Ice Cream

It is such a feeling to accomplish something you've been wanting to do for so long. Such a wonderful feeling! Now don't get too excited, there's still a long way to go, but last weekend my little cake venture took a big leap forward. Packing up the car, I trucked eight cakes, frosting, chocolate, spices, and nearly every kitchen tool I own from Brooklyn to New Haven, Connecticut, home to my friend/photography genius Sam. So ensued a cake photo-shoot extravaganza in preparation for my website-to-be. And I thought you might like a behind the scenes peek. Want to see?


Light and beautiful and sunny, we tore the apartment to pieces, finding just the right spot at just the right time of day to make the cakes look absolutely heaven sent (even if all the mess around them was anything but...).


Now, now, I said a peek. You'll get to see more as the project unfolds! I can't wait to share more.

And I won't leave you empty handed here today. In fact, I have another tidbit of news to share that is, for sweet teeth around the world, about as exciting as news can get... Last Monday, I came home to a brand new, beautiful, shiny, glorious and amazing ice cream maker! An absolute dream come true. I'm enthusiastic, you can tell. But why not be? Homemade ice cream is in itself like nothing else.

So of course I wasted no time in scrounging together anything we had in our kitchen to make the inaugural batch. A handful of cloves...a pinch of cinnamon...dark, thick maple syrup... The result, spiced maple ice cream that tasted like french toast and caramel and all things wintry and wonderful.


Ok, you caught me. I'm snacking on it right now. In fleece pj pants, using a take-out Chinese spoon because I'm avoiding the dirty dishes. But it's a cold and rainy Saturday night. Second to a hot summer day, the stuff that ice cream was made for!

In fact, I think I'm going to see about finishing up that cup right now.... Wishing you all a happy Saturday night, I'm signing off with love for accomplishments big and small, cake, and ice cream.


Spiced Maple Ice Cream

1 cup whole milk
1 pint heavy cream
12 whole cloves
1/2 teaspoon cinnamon
2/3 cup grade B maple syrup
6 egg yolks

1. Bring the milk, cream, cloves and cinnamon to a simmer. Turn off heat, cover and let steep for 30 minutes.
2. In a separate pot, bring maple syrup to a boil. Let boil for about 5 minutes.
3. Turn heat off syrup, and slowly pour the cream mixture into the syrup (careful, the mixture will spatter!)
4. In a medium sized bowl, slowly whisk the maple and cream mixture into the egg yolks.
5. Return the tempered mixture to a pot on the stove. Over medium heat, stir constantly until mixture coats the back of a spoon.
6. Quickly pour mixture through a fine strainer into a clean bowl resting in an ice bath.
7. Refrigerate overnight and prepare next day according to your ice cream maker's instructions!

Yield: approx. 1 quart

Tuesday, February 23, 2010

It Doesn't Look Pretty

I hate umbrellas in New York. I think they are misused. Tools to poke and jab, weapons rather than shields, excuses to walk blindly around the streets without a care who you are pushing into a puddle. All manners run straight down into the gutter when those darn city umbrellas open.

Today was a rainy, rainy, windy and wet day. So, in the name of manners and what's right in the world, I decided to don my rain boots and rain jacket, honorably leaving the umbrella at home. I returned tonight dripping, my jeans stuck to my frozen legs, frustratingly cursing both umbrellas, lack of umbrellas, and ultimately cold winter rain itself.

It was indeed a situation only remedied by a big, steaming bowl of hot soup.

Now, as much as I hate umbrellas I'm starting to love...crock pots. If my grumbling hasn't painted a picture of a grumpy old woman in a flannel nightie, then my love for crock pots may have just pushed me over the edge into tapered khakis, bifocals and a walker. But the truth is, when you don't have time to slowly stew veggies in a stock pot, a crock pot is just the thing! As if the morning knew just what the day had in store for my chilly umbrella-less-jean-clad legs, by the drizzle of morning light Russ started a mixture of white beans, split peas, chicken and spices, leaving it to slowly warm, stew and heat up until it sprawled a spicy trail down the hallway, meeting me upon returning home tonight.

And oh, it was delicious. Slightly spiced with curry and cumin, it was thick, stick-to-your-ribs, too-thick-to-be-soup soup. The best kind in my opinion. Really, really delicious. But...well, not so pretty.


I warned you. Not elegant, brightly colored, or classy-looking in any way. But hearty, warm, comforting and just the pairing for an ugly, rainy and not so pretty kind of day.


By the bottom of the bowl, my legs had warmed, my belly was full and my distaste for umbrellas had changed to the taste of shallots and beans, thyme and ground pepper. And you know, as I've mentioned before, one of the best qualities of soup is that it's just soup. Flavorful and at times deceivingly simple, it comes without bells and whistles. Just a bowl and a spoon. And bite by bite it warms you up, whittling away wet worries from the day.

Chance of rain? Umbrella or not, no matter how old or grumpy, and appearances aside, this little soup is just the thing to turn an ugly day into something lovely and tasty and in it's own simple soup-like way, sort of beautiful.


Split Pea and White Bean Soup with Chicken

1 pound green split peas
1 pound dry cannellini beans
2 large shallots, finely chopped
2 cloves of garlic, finely chopped
1 pound chicken thighs, skinless, cut into pieces
1 teaspoon dried thyme
1 1/2 teaspoons ground cumin
1/2 teaspoon curry powder
1/2 teaspoon cayenne pepper
30 turns of a pepper mill
3 teaspoons kosher salt
2 quarts of vegetable or chicken stock
Asiago cheese for garnish

1. Stir ingredients together in a crock pot.
2. Cook on low for 5 hrs, and on high for 2 hrs, stirring occasionally for even cooking.
3. Serve! If you prefer a thinner soup, stir in a light white wine to achieve desired consistency.

Yield: 8 warm-you-up servings